Adding Additional Fund Columns
Okay...like I told you before....it is a lot easier to delete or hide fund accounts than add them in the automatic accounting spreadsheets.
However, I do realize that each church and/or nonprofit is different and may require additional fund accounts. But let me warn you upfront that it is hard and time consuming to add more fund columns. If you need more than 5 funds, you might want to consider purchasing church accounting software.
But....if you have the time and patience....I have taken the time...and patience to write out a step-by-step guide for adding additional fund columns.
First things first....
- SAVE an original copy.
- Look at the bottom tabs.
- Click on the second tab named “Budget-to-Actual”.
The Church Accounting: How To Guide devotes a whole section of the book to payroll for churches. It covers payroll terminology and forms and then takes you through the steps necessary to set up a payroll, calculate and file the necessary taxes and forms, and even details how to handle the minister's payroll. It also includes sections on filling out IRS forms: 1099-Misc, 1099-NEC, and 1096.
If you have QuickBooks or are considering using it in the future, go ahead and purchase the QuickBooks for Churches and the How To Guide combo for a complete package on setting up and administering a payroll using QuickBooks.
Adding Fund Columns to Budget to Actual Report:
Okay...for these step-by step instructions, I will show you how to add 3 more fund accounts.
Then if you need more you can repeat the process, or if you want to add all your additional accounts at once...you can follow the instructions...but be aware that the cell numbers will not be the same.
- For each additional fund you want to add to the Budget-to-Actual report, you will need to insert 3 columns per fund.
- To insert multiple columns, select the same number of columns as you want to insert. In this example, we are going to insert 3 new fund accounts so we need to select columns J-R.
- You can either right click and click on Insert or…. On the Home tab, in the Cells group, click the arrow next to Insert, and then click Insert Sheet Columns.
- Then highlight (select) the columns S-AA, click copy in your tool bar, select column K.and hit Enter.
- You might want to stop right here and either type in fund names or number them 1 to 8 to avoid clicking on the wrong fund.
- Don't worry about all the #REF! in our newly formed columns. We are going to replace them with the correct formulas after we finish adding the extra columns to the general ledgers and reports.
Don't worry about the Summary by Month Report (3rd tab). It is a monthly summary of your all of your income and expenses and does not break it down by funds.
Adding Fund Columns to General Ledger:
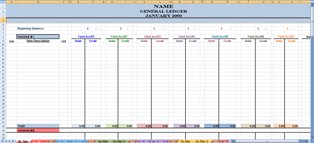
- Click on the January general ledger.
- For each fund account you want to add to the general ledger spreadsheet...you will need to insert 2 columns.
- To insert multiple columns, select the same number of columns as you want to insert. In this example, we are going to insert 3 new fund accounts so we need to select columns H-M.
- You can either right click and click on Insert or…. On the Home tab, in the Cells group, click the arrow next to Insert, and then click Insert Sheet Columns.
- Then highlight (select) the columns N-S, click copy in your tool bar, select column H.and hit enter.
- Change the font and shading on last 3 fund accounts if you want.
- Type in fund names or number 1 to 8.
- Now we need to pick up beginning balances for the newly formed funds. Click on CELL I10 (Fund 3) then hit equal sign.
- Go to Budget to Actual report and click in CELL K8 (the 3rd fund beginning cash) and hit Enter.
- From the JAN-GL ....pick up the corresponding beginning balances for the other 2 new funds Example: CELL K10, equal sign, CELL N8 on BTA report, Enter.
- Set formulas: select the total cell for the beginning balances...T10 in our example, hit F2, click the plus sign+, then click on cell I10, click +, then K10 + M10, and hit enter to set formula.
- Select the last cell in row 11....T11 in our example,.., click F2, backspace 3 times, type I11-H11+K11-J11+M11-L11+T10, and hit enter to set formula.
- Select cell T11 again, Notice the little white box on the bottom right corner of that cell. That is your “Fill Handle”. Put your mouse pointer over it. Notice how the pointer goes from a fat white plus sign to a skinny black plus sign. That means your fill handle is ready. Click and pull down to row 16 .
- Select in column T: 11-16, copy, click in cell T21, hit enter.
- Select T21 again, hit F2, backspace 2, type 16, hit enter.
- Now the rest is easy, just copy T21-15, select T31, hit enter.
- Do the same for the rest of the line accounts.
- Whew! One GL worksheet done...only 11 more left! Repeat all steps for the rest of the 11 general ledgers...remember what I said about time and patience?
Now let's add these extra funds to the monthly, quarterly, and annual reports and fix that mess back on the Budget to Actual report: Adding Fund Columns to Reports

Coupon!
Here is a 10% discount code for all the ebooks, spreadsheets, and packages on this site:
FCA
Note: click on "PACKAGES" in the top navigation bar for a list of all of the ebook and spreadsheet packages on this site!


